
Most car owners love the way their cars shine and look when parked under the sun. Unfortunately, many car owners are unaware that the sun can damage their car paint. The damage to car paint can vary depending on the intensity of sunlight and the duration of exposure to UV rays. Therefore, if you love your car, you need to know the right way how to fix sun damage on a car.
Sun damage is among the most prevalent paint damage. It badly impacts your car’s aesthetics and also largely reduces its resale value. So, never compromise on the safety of your car paint.
To always keep your car looking new and to maintain a high resale value, you must learn the following:
- How to protect car paint from sun
- How to fix sun damage on a car
Continue reading this article to learn how to protect and fix car paint damage.
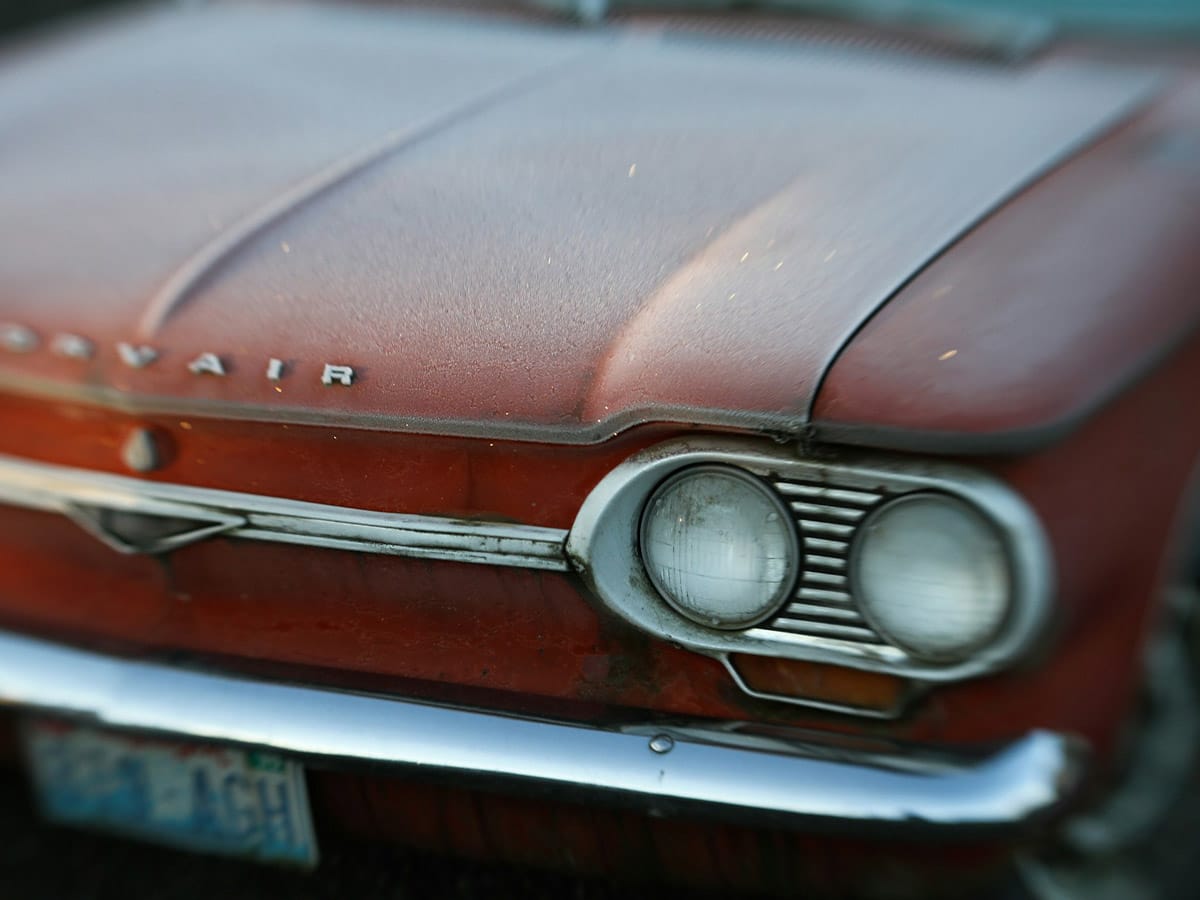
1. Types of Sun Damage to Car Paint
If you leave the car for a longer period under the sun, the extreme exposure can cause the following car paint problems:
- Discoloration
- Sun spots on car
- Sunburn car paint
- Peeling of car paint
- Faded car paint
- Car paint oxidation
- Car paint cracking
- Cloudy appearance
- Blistering of car paint
If your car is safe from any paint damage and you wish to keep it looking fresh and new, read our detailed post on the best ways to protect car paint.
2. Accessing the Amount of Sun Damage to Car Paint
Before doing anything, you need to assess the amount of sun damage to the car paint. This will help you follow the necessary steps to fix the sun damage.
2.1 Extreme-Level Sun Damage
If your car paint shows any of the above signs of sun damage to a level visible from a distance, the maximum damage has been done. To get your car back in shape, you will have to follow the detailed process of fixing sun damage. The more intense the damage is, the more detailed the procedure will be regarding how to fix sun damage on car paint.
2.2 Moderate-Level Sun Damage
On the other hand, if the sun damage is not evident from a distance, if you can tell the difference between the texture and color of different car parts, you must stop the problem from becoming bigger. If the problem has just started, you may be able to fix the sun damage by yourself without needing an expert’s help.
If you love your car and don’t want it to lose value, don’t let the problem grow. Follow the steps below to fix car paint damage.
2.3 Assess the Sun Damaged Car Paint Areas
Another important thing before you start the repairing process is to access the regions that are most affected. Identifying the sun-damaged areas on your car’s exterior will let you know where you should focus more.
3. Tools You Will Require to Fix the Car Paint Sun Damage
| Tools You Will Require to Fix the Car Paint Sun Damage | |
| Microfiber Cloth | The softest cloth is used for cleaning and drying. It does not scratch the car paint. |
| Automotive Cleaner/Shampoo | Used for washing and cleaning the car before fixing the sun damage. |
| Clay Bar | Used to remove impurities and contaminants on the car’s surface to prepare it for further treatment. |
| Sandpapers | Required to sand the car surface for leveling and removing any cracks or unevenness. |
| Newspapers | The car parts, which do not require fixing or painting, are covered with newspapers and masking tape. |
| Masking Tape | |
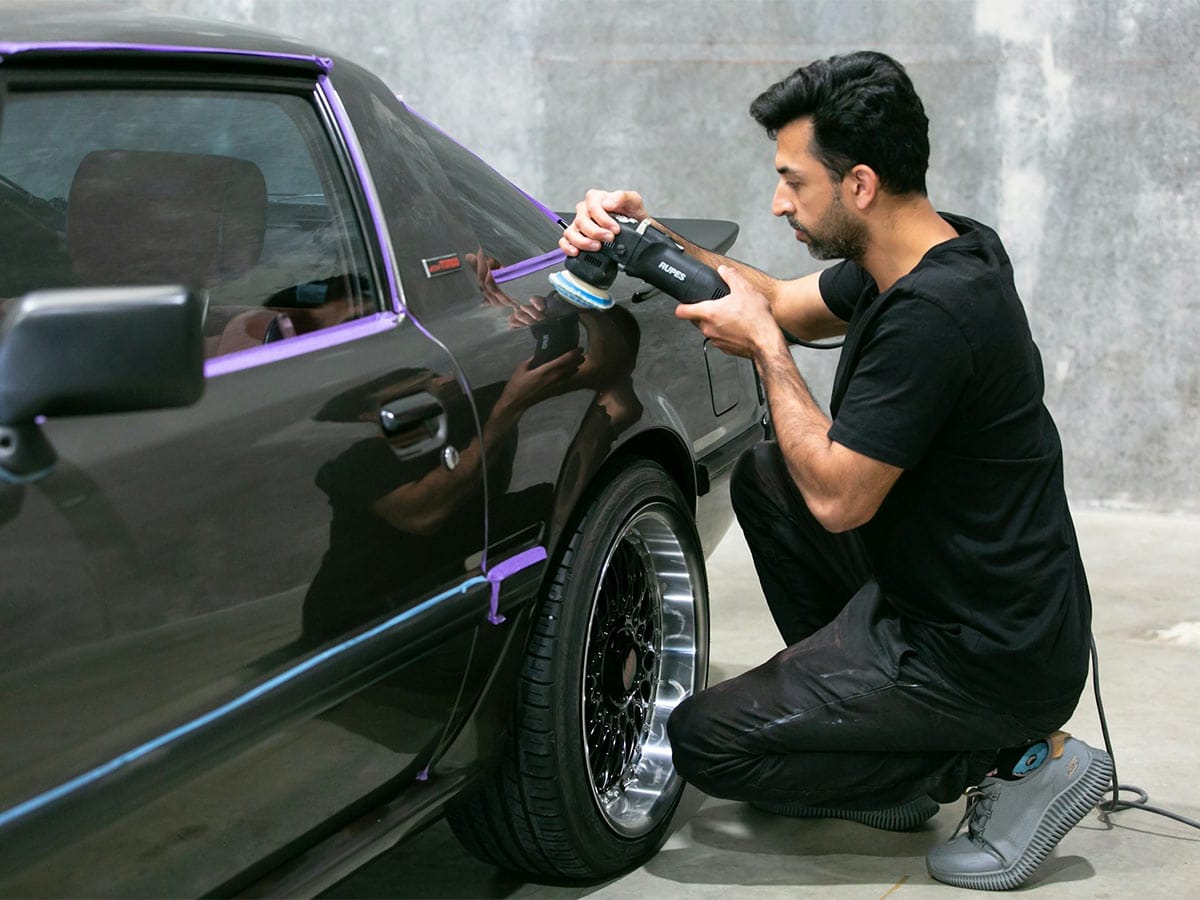
| Car Polisher | A machine used to give a glossy and clear finish to the paint is also known as the “buffer.” |
| Clear Coat | It is a layer above the paint to ensure a better finish. It also protects the paint layer from UV radiation and extreme weather conditions. |
| Car Wax | Car wax adds another security layer to the car paint. It protects the paint and clear coat. It makes small scratches and dirt stains less visible. It also helps in avoiding rust formation due to rain and moisture. |
| Paint | Required to paint the sun-damaged areas of the car. |
| Primer | Use before applying the paint coat. It helps prepare the surface for paint so that it sticks better. |
| Spray Gun | Equipment to apply a paint coat to the car like a professional. |
| Paint brushes | Required to treat scratches and imperfections on the car paint. |
| Touch-up pens | Required to paint very small scratches on the car’s surface. |
4. How to Fix Sun Damage on a Car
4.1 First Step: Wash the Car Properly
4.1.1 Prepare the Surface
Before you start the sun-damaged car paint restoration process, it is important to prepare the surface for treatment. To do this, you must remove all the dust, debris, impurities, or other contaminants from the car paint.
4.1.2 Wash it Properly
You are supposed to wash the car properly before doing anything. It is not just a simple wash. Do not forget that you are preparing the car for the restoration process. You must ensure that the microfiber cloth you use for cleaning has no dirt.
To wash your car properly, you will require:
- Water
- Automotive cleaner or shampoo
- Microfiber clothes
4.1.3 Pay Attention to Sun Damaged Areas
- While washing your car, pay special attention to the sun-damaged areas of the car’s paint.
- This will also give you a clear picture of how much damage has been done.
4.2 Second Step: Drying
- Drying is one of the most essential steps in the automotive cleaning process.
- Use a dry microfiber cloth for drying.
- You need to dry the car completely.
- Ensure there is no moisture left on the surface.
Note: Don’t use a towel or the same microfiber cloth you used for washing the car.
4.3 Third Step: Use the Clay Bar
If you are new to this, you may have no idea what a clay bar is and why it is used for cars. A clay bar is among the most common car cleaners. It is used to remove the most stubborn dirt particles and contaminants from your car paint.
- After washing the car properly, it is time to clean it using a clay bar.
- Hold it gently in your hand.
- Don’t apply too much pressure while using the clay bar to rub the sun-damaged areas.
- Use the clay bar in a back-and-forth motion.
- After using the clay bar, wipe away any residue using a dry microfiber cloth.
4.4 Fourth Step: Sanding the Sun-Damaged Areas
- To sand down the sun-damaged areas, you must have experience doing this. Otherwise, you can also cause damage to the non-damaged car paint.
- It is important to choose the right sandpaper, considering the level of sun damage to car paint.
- Sanding down the damaged parts with fine-grit sandpaper is perfect. It will make the surface even and prepare it for paint application.
- Do not use the coarse sandpaper with 60-80 grit as it can scratch the surrounding paint.
- Hold the sandpaper gently while sanding down the deep scratches and damaged car paint.
- For consistent sanding, move the sandpaper in circular motions.
- Do not apply extra pressure.
- Only use sandpaper on the sun-damaged areas.
- For perfection and better coverage, use a sand block or pad.
- It allows the paint and clear coat to stick better on the surface.
Before we get on to the primer, paint, and clear coat application, it is important to discuss the safety tips. Also, let’s discuss the techniques of using a spray gun and paint brushes for paint application.
Safety Tips
Whether it is primer, paint, or clear coat, all contain chemicals that can injure health if not used with care.
- Follow all the safety precautions as mentioned on the spray cans and packaging.
- Do not ignore any safety guidelines, as these chemicals can be hazardous if they come into contact with your skin.
- Also, do not inhale these chemicals.
Note: Before starting the procedures below, where you will paint the sun-damaged areas on your car, there is an important tip you should know. The painting must be performed in a safe and protected region or a paint booth.
The car must be protected from dust, debris, moisture, and other external elements. If these elements reside on the car's surface between the different steps and paint layers, it will ruin the whole procedure and your car’s look. So, don’t take this risk.
4.5 Fifth Step: Apply the Primer Coat
- If you are into painting cars or motorcycles, you must know what primer is.
- Primer makes the surface adhesive for the paint application. It also makes it smooth and even.
- Considering the extent of sun damage, you can apply the primer using a paint spray gun or brush.
- It also depends on the area to be covered.
- After applying the primer, give it the required time for drying. This must be mentioned on the primer can or packaging.
4.5.1 Why Are Spray Guns Better for Car Paint?
- Spray guns are best suited for applying primer, paint, and clear coat because they don’t create extra layers.
- Spray guns also help keep things even while coats are being applied.
- It ensures that the paint stays on the surface for a longer period.
- It also helps in a better finish.
- Do not move the spray gun or paint brushes in irregular directions while applying.
- Use them in one direction.
- Move the spray gun or the paintbrush uniformly.
- Don’t hold the spray gun in one place while applying the primer.
4.6 Sixth Step: Paint the Sun-Damaged Areas
4.6.1 Color Match
- The most important thing while fixing the sun-damaged car paint areas is to find the exact color match.
- If you fail to find the exact color match, it will ruin the look of your car.
4.6.2 Use Good-Quality Paint
- Also, go for the best-quality automotive paint that gives your car a factory finish after application. Don’t settle for low quality.
4.6.3 How to Paint
- Apply the paint smoothly using a spray gun.
- Don’t apply the paint in multiple strokes.
- Don’t apply extra layers of paint, as this will make the area look darker than the rest of the car paint.
- The paint you are applying must match the surrounding area’s paint.
- Start gradually. Don’t try to fill just one spot first and then the rest of the damaged region.
- Apply a thin base layer. Then, apply the second paint coat if needed.
- Avoid paint drips, as they will ruin the whole process.
- This is why spray guns are better than paint brushes for automotive car paint.
4.7 Seventh Step: Applying the Clear Coat
- Next, seal the primer and paint the layer with a clear coat.
- It helps in providing a glossy and professional-looking finish.
- The clear coat provides protection from UV rays from the sun and other external elements that can damage car paint.
- It also helps in making the car paint last longer.
- The clear coat also helps in protecting the car paint from sun damage.
- It helps in avoiding oxidation and rusting.
- The clear coat also helps the car paint from fading and avoids discoloration.
- Use the same steps of applying the clear coat as a primer and paint coats.
- Also, follow the instructions on the clear coat can or packaging.
- For better results, let the clear coat dry for the recommended time, as mentioned on the can or packaging.
- Applying three layers of clear coat for a professional look is better.
- Let each layer of clear coat dry for the recommended time before applying the next coat.
The sun damage car paint repair process is now completed. You have successfully fixed the sun-damaged areas on your car. If you haven’t fixed the sun damage on your car paint yet, follow the above-mentioned easy-to-follow steps.
Are we done fixing the car paint? Not yet! We must know the further steps to help us keep our car paint safe from future sun damage.
5. Tips to Protect Car Paint from Sun Damage
- Invest in a good-quality car cover if you have to park your car under the sun.
- If possible, park your car in a shaded area or a garage.
- Avoid parking your car under the sun as much as possible.
- Do not leave your car in the sun for a long time.
- Wash your car regularly.
- Keep your car clean always.
- Apply polish, car wax, or car paint sealant as they protect the car paint from UV radiation.
- Never use abrasive brushes, clothes, or cleaners to wash or clean your car.
6. Frequently Asked Questions (FAQs)
6.1 How Much Does It Cost to Repair Sun-Damaged Car Paint?
The cost to repair sun-damaged car paint can vary depending on the extent of the damage and the quality of the repair process. If almost every part of your car has sun damage, it will cost you more.
If you want to outsource the repair process, it’s better to take your car to a professional mechanic for a better overview.
- As a rough estimate, if you only have to repair the fender paint, it can cost you around $300-900.
- Fixing the roof area of your car can cost you around $500-1,500.
- Basic-Level Repainting: Meanwhile, if the whole car needs a repaint and fixing, it can cost you around $1,500-3,000
- Professional-Level Repainting: Professional-level repainting services and fixing the sun damage on the whole car will cost around $3,000-$5,000.
Do It Yourself (DIY) Repainting
If you want to save money, it is better to do it yourself (DIY). However, if you are afraid of ruining your car paint and messing up the fixing process, it is better to hire a professional. It is better not to take the risk, especially if you own an expensive car.
6.2 What Removes Sun Oxidation from Car Paint?
To remove sun oxidation from car paint, you must look for specific oxidation removal products. The products you use will depend on the level of sun oxidation on your car paint.
You will require a car paint oxidation remover that specializes in removing sun oxidation from car paint. Secondly, you will need a car paint polisher or wax.
- Start washing your car properly to remove any dust or debris from the paint.
- Then, apply the car paint oxidation remover as per the packaging instructions or the manual.
- After the oxidation marks on the car paint are removed or minimized, apply the wax coat to make the paint look even.
- Apply wax to your car almost twice a year, while you should apply a car polisher only once a year.
- Light oxidation on car paint can be treated using a car polisher.
- However, heavy oxidation will require a car oxidation remover to rub on the affected areas.
- Use car paint protection products that help avoid sun oxidation and harmful UV rays.
6.3 Will Car Wax Restore Faded Paint?
Car wax alone cannot restore faded paint. Applying a wax coat is part of the process of restoring sun damage to your car paint. However, car wax is used to keep the color and texture safe from fading or sun damage. Car wax is usually used after the car paint restoration to provide a smooth and clear finish. Car wax can help secure the paint from getting damaged as it acts as a sealant.
If you want to fix sun damage to your car paint, follow the steps mentioned in the article to make your car look new again.
6.4 Will Insurance Cover Sun Damage on a Car?
Car insurance does not cover sun damage to car paint. It usually covers unexpected damage or loss.
Sun damage to car paint is a gradual process. It happens as a result of continuous exposure to UV radiation when you leave your car under the sun for longer periods. It falls under wear and tear.
However, if the car paint damage is due to an accident or a weather-related incident, your car insurance may cover such damage.
6.5 How Long Does It Take for Sun to Damage Car Paint?
If you don’t use a car paint sealant or protector, like wax or polish, your paint will likely get sun-damaged early. Sun damage can start within a year or two.
It also depends on how long the car has been exposed to sunlight. The amount of UV radiation or the intensity of sunlight in a specific region also matters.
If you don’t protect your car from sun damage, it can take around five years for the sun to damage the paint.
6. Takeaway
If your car’s paint has been damaged by being exposed to the sun for a longer period, you can fix it to make your car look new. Don’t think it is irreversible. As mentioned in this article, all you need is the right approach, a few tools, and products to restore your car paint.
However, rather than fixing the problem, it is better to prevent it from happening. You can take care of your car, keep it clean, and avoid parking it under the sun.
Cars are a great asset nowadays. Don’t let your car sit under the sun if you don’t want your car to lose value. Extreme exposure to UV radiation from the sun can damage car paint. Take care of your car paint as much as you take care of your skin.

Thanks for sharing these insights. definitely bookmarking this for future reference
Thanks so much for bookmarking the post! I’m really glad you found the insights valuable. It means a lot.
Nice. Very informative!
Thanks! I’m thrilled to hear you found it informative.